Thursday, April 29, 2021

How to speed up a clip in Premiere Pro to give it a timelapse-like effect

There are several ways to make a visually stunning timelapse-like video with the Mavic 2 Pro and Adobe’s Premiere Pro editing software. One of the ways to create a timelapse-like video is through the “Hyperlapse” function available in-flight via the DJI Go 4 app. While this is arguably the simplest way to create a timelapse with the drone, sometimes the spark of creativity to make one or learning you need one doesn’t happen until later.

There are even built-in effects that can be added to a clip to give the video a little bit of glitching between frames to make the video appear more like a genuine timelapse shot using photos. This effect is called “Posturize Time,” but what is covered here is simply a video sped up.

Utilizing some pre-existing footage, creating a timelapse in Premiere Pro using a .mp4 or .mov file is easier than it sounds. Before anything is done in Premiere, it’s important to consider which clip will be used. A video clip with a duration under 30-seconds isn’t going to give as great of a result as a clip one to five minutes long.

There are a few reasons for this, but the main reason is that the longer the clip available with smooth, continuous video, the more room to make adjustments in Premiere. For example, if the clip imported is 40-seconds long and there are 5-seconds at the beginning where the shot wasn’t quite set up yet and a 5-seconds at the end of the recording where the drone’s camera jerked up a little bit, that leaves 30-seconds remaining of usable content.

Now, there’s a 30-second clip in the timeline of cars passing by on the freeway and what’s needed is a ten-second clip. Creating the timelapse effect from video footage means increasing the clip’s speed thereby shortening the clip’s duration.

A 500% increase in video speed looks pretty good, but the clip is only 6-seconds long. 300% nails the needed clip duration at 10-seconds, but the timelapse effect isn’t the best. Instead of hundreds of cars flying by it is almost possible to follow one car during the shot.

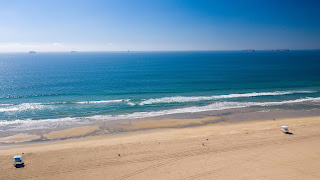
For the purposes of this article a clip with a duration of 60-seconds will be used. If the clip is longer than that, say 1:20s, even better. Import that clip into Premiere then drag it to the timeline.
Shortening video clip length in Premiere
Once in the timeline, pull in 10-seconds of each end of the clip to create the 60-second clip. The benefit of dragging the ends as opposed to trimming each side is, if the clip is getting dropped into another project, now there’s video available for smooth transitions.

Right-click on the clip in the timeline and select “Speed/Duration…” When a small window appears the current speed and duration of the unmodified clip is shown and should look like this:
Adjusting clip speed and duration in Premiere

Click on “100%” and change it to “600%,” and the duration will automatically adjust itself to “00:00:10:00.”

Render the footage by selecting the clip and pressing “CMND + R” or if using a PC “CTRL + R.” Once rendered the preview of the sped-up clip will begin playing. The only thing left to do now is “File > Export > Media…” then choose the preferred output settings.

That’s it. A 60-second clip has been squished into a 10-second clip making the video appear like time is sped up.
The end result. 100% vs 600%


Photo credits: Thomas Husen

Monday, April 26, 2021

Four settings adjustments to achieve a cinematic image with the Mavic 2 Pro

1. Always shoot in manual settings with “DLog-M.”

What will come to be a disappointing surprise initially when uploading your footage after shooting with the DLog-M profile will transform into awe after making a few easy color corrections using photo/video editing software such as Adobe's Premiere Pro or Apple's Final Cut Pro.

This shooting profile is what’s considered a RAW format. What is maybe most noticeable right from the get-go is how dull all the colors are–they’re neutral. If you didn’t know any better, you might think to yourself, “Wow. I had no idea the world was so gray,” or maybe and probably more likely you’d think something was wrong with the camera.

If it’s time that you have none of and couldn’t possibly spare five to twenty minutes of making adjustments post-shoot then make the time or maybe it is best not to shoot raw.

That being said, if top-shelf quality is of the utmost importance then D-Log is the go-to. The D-Log profile offers the most room for color correction due to the 10-bit color capabilities. There are heaps of resources online to get a more in-depth understanding of color science but two of the most common graphics storage methods (8-bit and 10-bit) are discussed here briefly.


8-bit color is the system utilized to store an image’s information and each pixel represents one byte or 8-bits. It offers 256 red shade values, 256 green shade values and 256 blue shade values which offer a combined 16,777,216 available colors. If this is new information then this range of color possibilities likely sounds staggering and surely it was in the early 90s.

10-bit color on the other hand, like featured in the Mavic 2 Pro’s optional D-Log setting allows for 1,024 possible shades of each primary color respectively generating 1,073,741,824 (1,0243) possible colors. The increase in available red, green and blue shades for the camera to store will create a better, more accurate life-like image.

2. Exposure: Adjust the aperture between f/2.8 and f/5.6, strive for the lowest ISO and set the shutter speed to twice that of your frame rate.

Setting the aperture around f/4 will give the best results by achieving a balance between image sharpness and an even depth-of-field. Opening up the aperture from f/5.6 to f/2.8 allows the camera's sensor to gather more information about whatever or whoever is being captured which means more light is entering through the camera's iris.

Increasing f-numbers decreases amount of light
Understanding f-stop ratios can get a little complicated the deeper it's read into but in a few words, increasing the f-numbers means decreasing the size of the opening for light to enter and vice versa.

The more information gathered the better but without making some additional adjustments to the shutter speed or swapping out the standard UV filter with an ND filter the subject will likely be heavily overexposed or blown out.

So what's the workaround? Increasing the shutter speed is one option. The shutter speed is measured by the amount of time the shutter is opened per second. As the shutter increases the more light is required. As the shutter decreases less light is required and the subject will appear to blur when in motion.

Achieving the right amount of blur between frames as a subject is moving is much of what gives a video that cinematic aesthetic that also relies on the chosen frame rate. Frame rate and shutter speed go hand-in-hand when aiming for a cinematic image, specifically a frame rate of 24 frames per second or more precisely 23.976fps; the standard frame rate used in the majority of major motion pictures.

With the frame rate set to 23.976, the aperture set around f/4 and the ISO set to 100 the question of the shutter speed's adjustment is all that remains and can actually be answered simply by following a rule of thumb.

The 180° rule of shutter is a standardization developed by the motion film industry that says whatever frame rate is being used, in this case 23.976, the shutter speed should be doubled. An exact figure would mean setting the shutter speed to 1/47.952 second but most camera systems won't offer this frame rate, so choose the next closest (1/50 second). Because 23.976 is the industry standard, 1/50 second is the appropriate shutter speed, but the 180° rule can also be applied to other frame rates: 25fps and 1/50s, 30fps and 1/60s, 60fps and 1/120s and so on.

Manual settings configuration
The settings are dialed in but how does the image preview look, is it completely blown out? Whether or not the preview is bright white will depend on what the current lighting situation is. For the sake of this post being about dialing in drone settings and drones generally shooting while the sun is out, we'll say, yes, the picture is in fact overexposed.

So what is the solution? An ND filter. This little piece of tinted glass will cut the amount of light that reaches your camera’s sensor, in a way it’s a bit like tricking the camera into thinking there’s less light than there actually is, granting access to the above settings while attaining a properly exposed image with cinematic motion blur. Now it's time to get out there and create some visually appealing cinematic footage–or don't, you do you.

For more information about ND filters refer to the previous post here.


Photo credits: Thomas Husen; KoeppiK, CC BY-SA 4.0; Thomas Husen


Friday, April 23, 2021

Why ND filters?

ND filters, neutral density filters, are a necessary tool in the world of photography. They are the answer to your blown-out, over-exposed videos and photos. The filters help with the amount of light entering your lens which thereby reduces the amount of light reaching the sensor. They allow for the capture of shallow depth-of-field objects without your image getting over-exposed.

It’s a bright, beautiful sunny day on a rural and picturesque landscape with very few clouds in the sky, a perfect time to capture some aerial shots with an OTB drone, right?
Reduction of light to sensor at ideal settings

Wrong. Unless of course you’re prepared to sacrifice video image quality by boosting your ISO several thousand stops to capture that regal-looking cow atop a grassy hill, which isn’t recommended, the right way would be to apply an ND filter. Think of ND filters as a tint for the camera’s lens or sunglasses.

ND filters are relatively easy to acquire, simple to install and probably won’t break the bank, depending on who the manufacturer is and how many are added to the gear bag.

Polar Pro offers a wide selection of ND filters that are available for various manufacturers and models but tend to be on the pricey side. For the more budget-conscious buyer finding some decent quality filters through Amazon is entirely acceptable, just take a few minutes to read some of the product’s reviews instead of purchasing the first set found.

Just like how sunglasses for humans can be bought with polarization, sunglasses can be bought for UAVs, unmanned aerial vehicles. Polarization produces richer colored landscapes and allows for depth when shooting water, thanks to a reduction of glare.
 
The effects of polarization
A polarizing filter isn’t always necessary, but if the plan is to get some footage of dolphins playing in the ocean or to fly through the city on a sunny day surrounded by mirror-windowed skyscrapers, shooting through a polarized lens will make a world of difference.

On top of nearly eliminating reflections, when polarization is combined with the appropriate level of tint by selecting the right strength of ND filter for any given weather condition. The right amount of motion blur can be achieved between video frames when dialing in the shutter speed and aperture, which is something that can’t be achieved cleanly without a filter.

The takeaway from this article is hopefully one that inspires shooting better video and bold-colored photos by utilizing the right tools available.


Photo credits: Thomas Husen; Reddit user: Reacher_Said_Nothing

Monday, April 19, 2021

Lifesaving Drones of San Mateo, California

Southern California lifeguard towers
San Mateo, California lifeguards implement the use of drones to assist in lifesaving operations

San Mateo, California lifeguards have begun implementing drone use into their lifesaving operations. Wherever the wrath of mother nature is concerned, medical emergencies tend to go hand in hand.

With twice the number of ocean rescues logged in 2019 and 2020 and two fatal drownings within the first month of 2021, the traditional rescuing operations comprised of fleshy, warm-blooded humans running and swimming to save the life of someone struggling in the water wasn’t cutting it.

Rosemary Blankswade, a spokesperson for the San Mateo Sheriff’s Office told NBC News, “At the beginning of the year when we had two of those fatal drownings, we really kind of stepped up our efforts as far as research and getting those tools in place sooner than later.”

Unmanned aircraft (drones) have come a long way since being solely operated by the military in covert operations but with the right amount of discipline and a big enough piggy bank they can be operated recreationally by children. What’s discussed here is the in-between.

San Mateo Sheriff’s officers and lifeguards have found a way to incorporate these small, thermoplastic-structured flying machines into their everyday rescue operations but they haven’t quite finished with testing.

The end goal is to coexist with the drones, not to make in-person assistance obsolete. The DJI Mavic 2 drones are fitted with a unique releasing mechanism that allows them to carry and drop a lifejacket to the distressed swimmers.

Ocean lifeguard utilizes UAV
"Depth perception is really hard. I think they just err on the side of caution and stay a little bit higher. But, ideally, we would like to get a lot more practice in trying to kind of get the life jacket directly to the person,” Blankswade said.

For now, the San Mateo Sherriff’s department is focused on training the designated remote pilots to run these rescues without a hitch. With eight UAVs (Unmanned Aerial Vehicles/drones) and eight remote pilots, San Mateo aims to create a safer environment for all local beachgoers in the warm months to come.

Photo credit: Thomas Husen; Surfline Saving NSW


7 Best Drones in 2021 to Shoot 4K Video

Drones come in all shapes and sizes and offer a wide range of specifications and unique features and buying a drone that suits your specific...